Instalação do SpeedTest (OoklaServer) no Debian 11/12 gerenciado pelo systemd

Neste tutorial iremos aprender a instalar o SpeedTest Server, porém vamos gerenciar o serviço dele pelo systemd, o que eu acho que já deveriam ter feito, ou a ookla já poderia disponibilizar isso via repositório. #FicaDicaOokla
Leia
– Requisitos do hardware do servidor Speedtest.
– Política de aceitação do servidor Speedtest
– Toda Documentação.
Configuração do DNS
No exemplo vou usar o subdomínio teste, no domínio remontti.com.br `teste.remontti.com.br`, logo é necessário configurar seu subdomínio “teste” em seu DNS Server, NÃO USE subdomínio chamado speedtest pois você terá possivelmente seu pedido negado. Exemplo de entradas no DNS para IPv4 (A) e IPv6 (AAAA)
[...]

teste       A       192.168.0.2
            AAAA    2001:db8:bebe:cafe::2

[...]
Distribuição testadas
Debian 12 Bookworm
Debian 11 Bullseye
Pacotes necessários, não esqueça de virar root de forma correta `su -`
# su -
# apt install vim wget unzip net-tools psmisc
Faça alguns ajustes de kernel para melhorar a performace do servidor:
# vim /etc/sysctl.conf
Adicione ao final:
# Kernel deve tentar manter o máximo possível de dados em memória principal
vm.swappiness = 5

# Evitar que o sistema fique sobrecarregado com muitos dados sujos na memória.
vm.dirty_ratio = 10
vm.dirty_background_ratio = 5

# Aumentar o número máximo de conexões simultâneas
net.core.somaxconn = 65535

# Aumentar o tamanho máximo do buffer de recepção e transmissão de rede
net.ipv4.tcp_mem = 4096 87380 16777216
net.core.rmem_max = 16777216
net.core.wmem_max = 16777216
net.ipv4.tcp_rmem = 4096 87380 16777216
net.ipv4.tcp_wmem = 4096 65536 16777216

# Melhorar o desempenho da conexão e a evitar congestionamentos
net.ipv4.tcp_sack = 1
net.ipv4.tcp_window_scaling = 1
net.ipv4.tcp_moderate_rcvbuf = 1
net.ipv4.tcp_timestamps = 1

# Reduzir o tempo limite de conexão TCP
net.ipv4.tcp_fin_timeout = 15

# Ativar o escalonamento de fila de recepção de pacotes de rede
net.core.netdev_max_backlog = 8192

# Aumentar o número máximo de portas locais que podem ser usadas
net.ipv4.ip_local_port_range = 1024 65535

# Define o controle de saída de pacotes como "fq" para melhorar a distribuição de dados.
net.core.default_qdisc=fq

# Ativa o algoritmo BBR para melhorar a velocidade e evitar congestionamento de rede.
net.ipv4.tcp_congestion_control=bbr
Carregue para o kernel as novas alterações
# sysctl -p
Módulos do kernel
# modprobe -a tcp_illinois
# echo "tcp_illinois" >> /etc/modules
TCP Illinois é um algoritmo de controle de congestionamento que utiliza uma combinação de técnicas de controle de congestionamento baseadas em perda e atraso para melhorar o desempenho em redes de alta perda. Ele foi projetado para funcionar bem em ambientes móveis sem fio, onde a perda de pacotes é frequentemente causada por condições de RF em mudança.
# modprobe -a tcp_westwood
# echo "tcp_westwood" >> /etc/modules
TCP Westwood é um algoritmo de controle de congestionamento que utiliza medidas de janela e de banda para detectar congestionamentos em vez de depender da detecção de perda de pacotes, que pode ser menos confiável em ambientes sem fio. Ele foi projetado especificamente para ambientes móveis sem fio e pode ser uma boa opção para melhorar o desempenho em redes sem fio com alta variação de taxa de perda de pacotes.
# modprobe -a tcp_htcp
# echo "tcp_htcp" >> /etc/modules
O TCP-HTCP (Highspeed TCP for large congestion windows) é um algoritmo de controle de congestionamento do protocolo TCP que foi projetado para melhorar o desempenho em conexões de alta velocidade com janelas de congestionamento grandes.
Vamos criar o diretório /usr/local/src/ooklaserver onde ira ficarnossa aplicação OoklaServer.
# mkdir /usr/local/src/ooklaserver
Vamos baixar nosso script de instalação em /usr/local/src/ooklaserver e executar a instalação.
# cd /usr/local/src/ooklaserver
# wget https://install.speedtest.net/ooklaserver/ooklaserver.sh
# chmod +x ooklaserver.sh
# ./ooklaserver.sh install
Please confirm (y/n) > y
Server Platform is linux-x86_64-static-musl
This will install the Ookla server for linux-x86_64-static-musl to the current folder. Please confirm (y/n) > y
Checking Directory Structure
Downloading Server Files
--2024-11-12 16:55:44--  https://install.speedtest.net/ooklaserver/stable/OoklaServer-linux-x86_64-static-musl.tgz
Resolvendo install.speedtest.net (install.speedtest.net)... 2a04:4e42::731, 2a04:4e42:200::731, 2a04:4e42:400::731, ...
Conectando-se a install.speedtest.net (install.speedtest.net)|2a04:4e42::731|:443... conectado.
A requisição HTTP foi enviada, aguardando resposta... 200 OK
Tamanho: 4638658 (4,4M) [application/gzip]
Salvando em: “OoklaServer-linux-x86_64-static-musl.tgz”

OoklaServer-linux-x86_64-static-mus 100%[================================================================>]   4,42M  21,9MB/s    em 0,2s

2024-11-12 16:55:46 (21,9 MB/s) - “OoklaServer-linux-x86_64-static-musl.tgz” salvo [4638658/4638658]

Extracting Server Files
OoklaServer
OoklaServer.properties.default
Stopping OoklaServer Daemon (5419)
Starting OoklaServer
Daemon Started (5464)
NOTE:

We strongly recommend following instructions at

   https://support.ookla.com/hc/en-us/articles/234578588-Linux-Startup-Script-Options

to ensure your daemon starts automatically when the system reboots
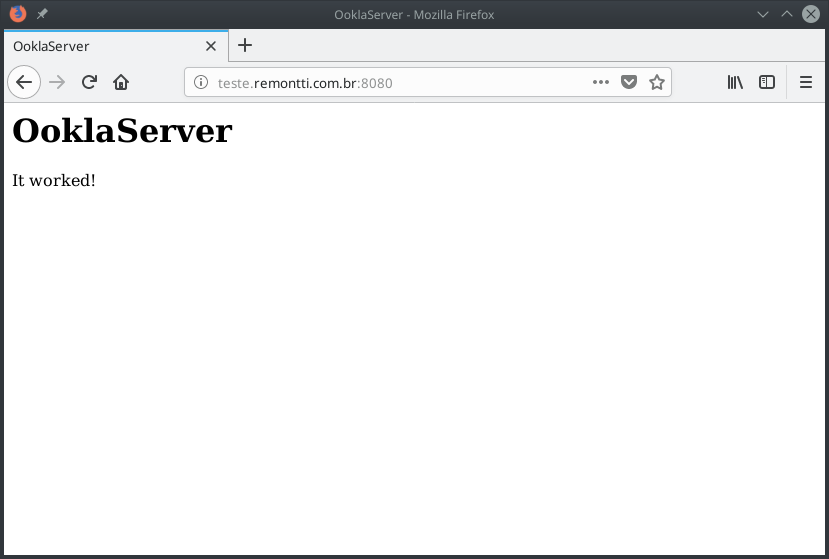
Neste momento o servidor ookla já iniciou, acesse em seu navegado http://sub.dominio:8080 e verifique se o mesmo esta rodando> OoklaServer – It worked!
Pare o serviço ooklaserver
# ./ooklaserver.sh stop
Ou (se seu tempo é curto)
# killall -9 OoklaServer
Stopping OoklaServer Daemon (715) . . . . . . . . . . . . . . . . . . . .
Additional OoklaServer processes running; stopping
Stopping OoklaServer Daemon (715) . . . . . . . . . . . . . . . . . . . .
Stopping OoklaServer Daemon (858) .
Stopping OoklaServer Daemon (859) .
Stopping OoklaServer Daemon (879) . . . . . . . . . . . . . . . .
Lingering OoklaServer processes running; killing (715
964
965)
Edite o arquivo de configuração OoklaServer
# vim /usr/local/src/ooklaserver/OoklaServer.properties
A partir de 2023 IPv6 virou obrigatório, descomente (remova o # da frente) a linha a baixo deixando true.
OoklaServer.useIPv6 = true
Descomente a linha e inclua todos seus subidominios para seu domínio ex `*.remontti.com.br`
OoklaServer.allowedDomains = *.ookla.com, *.speedtest.net, *.remontti.com.br
Ativa o filtro que bloqueia agentes de usuário conhecidos como indesejados, ajudando a reduzir tráfego de fontes não oficiais.
OoklaServer.userAgentFilterEnabled = true
Define o número máximo de conexões simultâneas permitidas por endereço IP; o padrão é 50.
OoklaServer.ipTracking.maxConnPerIp = 5
Estabelece o número máximo de conexões permitidas por IP dentro de cada intervalo de tempo (bucket); o padrão é 10.
OoklaServer.ipTracking.maxConnPerBucketPerIp = 10
Define a capacidade máxima do pool de threads de trabalho; o padrão é 30.000.
OoklaServer.workerThreadPool.capacity = 30000
Especifica o tamanho máximo de quadro (frame) aceito em conexões WebSocket, em bytes; o padrão é 5 MB (5.242.880 bytes).
OoklaServer.websocket.frameSizeLimitBytes = 5242880
Define o tempo máximo, em minutos, para manter estatísticas de IPs inativos após a última conexão registrada; o padrão é 35 minutos.
OoklaServer.ipTracking.maxIdleAgeMinutes = 35
Se você desejar visualizar os logs descomente em “# Log to files”. Um arquivo em /usr/local/src/ooklaserver/ooklaserver.log será criado.
# Log to files
#
logging.loggers.app.name = Application
logging.loggers.app.channel.class = FileChannel
logging.loggers.app.channel.pattern = %Y-%m-%d %H:%M:%S [%P - %I] [%p] %t
logging.loggers.app.channel.path = ${application.dir}/ooklaserver.log
logging.loggers.app.level = information
Sobreecreva OoklaServer.properties.default com o OoklaServer.properties, para em futuras atualizações (Ocorre automaticamente) ele use como base as suas configurações.
# cp /usr/local/src/ooklaserver/OoklaServer.properties /usr/local/src/ooklaserver/OoklaServer.properties.default
Para que o Ooklaserver seja tratado como um serviço vamos configurar-lo no systemd.
# vim /lib/systemd/system/ooklaserver.service
[Unit]
Description=OoklaServer-SpeedTest
After=network.target

[Service]
User=root
Group=root
Type=simple
RemainAfterExit=yes

WorkingDirectory=/usr/local/src/ooklaserver
ExecStart=/usr/local/src/ooklaserver/ooklaserver.sh start
ExecReload=/usr/local/src/ooklaserver/ooklaserver.sh restart
#ExecStop=/usr/local/src/ooklaserver/ooklaserver.sh stop
ExecStop=/usr/bin/killall -9 OoklaServer

TimeoutStartSec=60
TimeoutStopSec=300

[Install]
WantedBy=multi-user.target
Alias=speedtest.service
Recarrege o daemon
# systemctl daemon-reload
Verifique o status, nosso serviço ira estar disabled
# systemctl status ooklaserver
● ooklaserver.service - OoklaServer-SpeedTest
     Loaded: loaded (/lib/systemd/system/ooklaserver.service; disabled; vendor preset: enabled)
     Active: inactive (dead)
Vamos deixa-lo enable para subir com o boot do sistema.
# systemctl enable ooklaserver
Created symlink /etc/systemd/system/speedtest.service → /lib/systemd/system/ooklaserver.service.
Created symlink /etc/systemd/system/multi-user.target.wants/ooklaserver.service → /lib/systemd/system/ooklaserver.service.
Verifique se ficou enabled
# systemctl status ooklaserver
● ooklaserver.service - OoklaServer-SpeedTest
     Loaded: loaded (/lib/systemd/system/ooklaserver.service; enabled; vendor preset: enabled)
     Active: inactive (dead)
Inicie o serviço e verifique seu status se o mesmo ficou active.
# systemctl start ooklaserver
# systemctl status ooklaserver
● ooklaserver.service - OoklaServer-SpeedTest
     Loaded: loaded (/lib/systemd/system/ooklaserver.service; enabled; vendor preset: enabled)
     Active: active (exited) since Fri 2021-11-05 15:31:58 -03; 1s ago
    Process: 2408 ExecStart=/usr/local/src/ooklaserver/ooklaserver.sh start (code=exited, status=0/SUCCESS)
   Main PID: 2408 (code=exited, status=0/SUCCESS)
      Tasks: 47 (limit: 2312)
     Memory: 10.5M
        CPU: 185ms
     CGroup: /system.slice/ooklaserver.service
             ├─2416 ./OoklaServer --daemon --pidfile=/usr/local/src/ooklaserver/OoklaServer.pid
             └─2420 /usr/local/src/ooklaserver/OoklaServer --ward --parent-pidfile=OoklaServer.pid --server-id=d907db80a>

nov 05 15:31:58 deb11 systemd[1]: Started OoklaServer-SpeedTest.
nov 05 15:31:59 deb11 ooklaserver.sh[2408]: Starting OoklaServer
nov 05 15:31:59 deb11 ooklaserver.sh[2408]: Daemon Started (2416)
Se desejar reinicie o servidor para ver se o serviço ooklaserver carregou no boot!
# reboot
Ao voltar verifique se o mesmo iniciou.
# systemctl status ooklaserver
● ooklaserver.service - OoklaServer-SpeedTest
     Loaded: loaded (/lib/systemd/system/ooklaserver.service; enabled; vendor preset: enabled)
     Active: active (exited) since Fri 2021-11-05 15:34:19 -03; 22s ago
    Process: 332 ExecStart=/usr/local/src/ooklaserver/ooklaserver.sh start (code=exited, status=0/SUCCESS)
   Main PID: 332 (code=exited, status=0/SUCCESS)
      Tasks: 50 (limit: 2312)
     Memory: 18.3M
        CPU: 157ms
     CGroup: /system.slice/ooklaserver.service
             ├─390 ./OoklaServer --daemon --pidfile=/usr/local/src/ooklaserver/OoklaServer.pid
             └─404 /usr/local/src/ooklaserver/OoklaServer --ward --parent-pidfile=OoklaServer.pid --server-id=da57142421>

nov 05 15:34:19 deb11 systemd[1]: Started OoklaServer-SpeedTest.
nov 05 15:34:20 deb11 ooklaserver.sh[332]: Starting OoklaServer
nov 05 15:34:20 deb11 ooklaserver.sh[332]: Daemon Started (390)
Certifique-se acessando em seu navegador http://sub.dominio:8080.
O serviço ooklaserver tem um alias com o nome speedtest, então se quiser usar `systemctl status speedtest` também funiona. 😉
# systemctl status speedtest
Para verificar a versão use:
# /usr/local/src/ooklaserver/OoklaServer -v
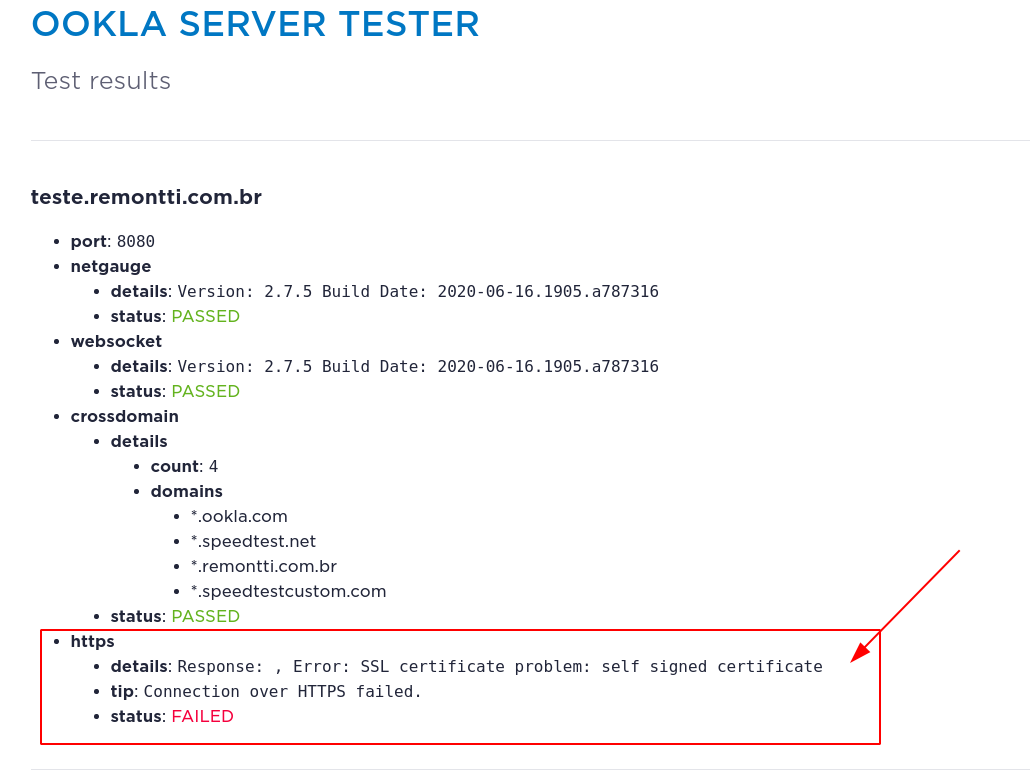
Se você realizar o teste agora https://www.ookla.com/pt/host-tester você encontrará 1 erros:
É que você não tem certificado válido, a OoklaServer fala que você pode usar o certifica automatico que ela ira gerar, ao fazer o registro. Nota: Este processo automatizado só começa depois que o servidor foi registrado e revisado por Ookla . Você pode ler aqui mais sobre.
Solução para o certificado
Vamos instalar o Certbot, que irá gerar os certificados com o Let’s Encrypt.
# apt install certbot
Geramos o certificado para teste.remontti.com.br, lembrando que seu servidor DNS deve estar apontando para o IP Publivo do seu servidor para poder gerar o certificado sem erro.
# certbot certonly --standalone
Reponda: email (null@remontti.com.br), Y, N, Seu Domínio
Saving debug log to /var/log/letsencrypt/letsencrypt.log
Plugins selected: Authenticator standalone, Installer None
Enter email address (used for urgent renewal and security notices)
 (Enter 'c' to cancel): null@remontti.com.br                            <<<<<<<<<<<<<<<<<<<<<

- - - - - - - - - - - - - - - - - - - - - - - - - - - - - - - - - - - - - - - -
Please read the Terms of Service at
https://letsencrypt.org/documents/LE-SA-v1.2-November-15-2017.pdf. You must
agree in order to register with the ACME server. Do you agree?
- - - - - - - - - - - - - - - - - - - - - - - - - - - - - - - - - - - - - - - -
(Y)es/(N)o: Y                                                           <<<<<<<<<<<<<<<<<<<<<

- - - - - - - - - - - - - - - - - - - - - - - - - - - - - - - - - - - - - - - -
Would you be willing, once your first certificate is successfully issued, to
share your email address with the Electronic Frontier Foundation, a founding
partner of the Let's Encrypt project and the non-profit organization that
develops Certbot? We'd like to send you email about our work encrypting the web,
EFF news, campaigns, and ways to support digital freedom.
- - - - - - - - - - - - - - - - - - - - - - - - - - - - - - - - - - - - - - - -
(Y)es/(N)o: N                                                           <<<<<<<<<<<<<<<<<<<<<
Account registered.
Please enter in your domain name(s) (comma and/or space separated)  (Enter 'c'
to cancel): teste.remontti.com.br                                       <<<<<<<<<<<<<<<<<<<<<
Requesting a certificate for teste.remontti.com.br
Performing the following challenges:
http-01 challenge for teste.remontti.com.br
Waiting for verification...
Cleaning up challenges

IMPORTANT NOTES:
 - Congratulations! Your certificate and chain have been saved at:
   /etc/letsencrypt/live/teste.remontti.com.br/fullchain.pem
   Your key file has been saved at:
   /etc/letsencrypt/live/teste.remontti.com.br/privkey.pem
   Your certificate will expire on 2022-02-03. To obtain a new or
   tweaked version of this certificate in the future, simply run
   certbot again. To non-interactively renew *all* of your
   certificates, run "certbot renew"
 - If you like Certbot, please consider supporting our work by:

   Donating to ISRG / Let's Encrypt:   https://letsencrypt.org/donate
   Donating to EFF:                    https://eff.org/donate-le
Os arquivos do certificado foram criados em /etc/letsencrypt/live/SUB.DOMINIO.XXX.XX/ com validade de 90 dias.
Edite o arquivo de configuração OoklaServer, para usar o nosso certificado gerado.
# vim /usr/local/src/ooklaserver/OoklaServer.properties
Localize openSSL.server.certificateFile e openSSL.server.privateKeyFile
# openSSL.server.certificateFile = cert.pem
# openSSL.server.privateKeyFile = key.pem
Descomente as linhas e e adicione o caminho para os seus.
openSSL.server.certificateFile = /etc/letsencrypt/live/SUB.DOMINIO.XXX.XX/fullchain.pem
openSSL.server.privateKeyFile = /etc/letsencrypt/live/SUB.DOMINIO.XXX.XX/privkey.pem
Sobreecreva OoklaServer.properties.default com o OoklaServer.properties novamente para em futuras atualizações.
# cp /usr/local/src/ooklaserver/OoklaServer.properties /usr/local/src/ooklaserver/OoklaServer.properties.default
Reinicie o OoklaServer. (Pode levar ate 2min, tenha paciência)
# systemctl restart ooklaserver.service
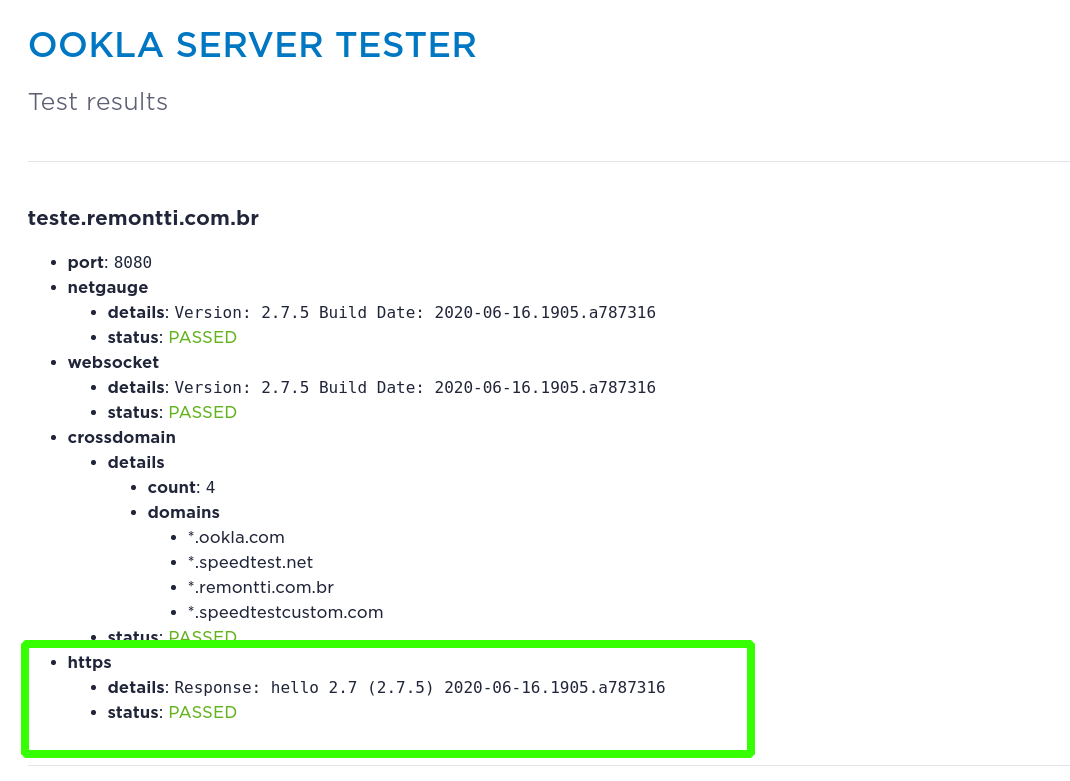
Agora acesse com HTTPS em seu navegador: https://sub.dominio:8080, e o certificado agora deve ser válido.
Realizando os testes novamente em https://www.ookla.com/pt/host-tester, o erro de certificado estará resolvido.
Mais ao final deixarei um script para renovação automática do certificado, pois o mesmo é valido apenas por 90 dias.
Cadastro Ookla
Hora de criar sua conta no ookla.com e fazer a solicitação para virar um host! https://account.ookla.com/register/servers, se você já tem acesse: https://account.ookla.com/servers/create
Com sua conta criada e validada no e-mail de verificação logue: https://account.ookla.com/, clique em Go To Servers, e aceite os Termos. Add Server preencha com os seus dados e do servidor.
Agora basta aguardar, pode levar alguns dias para aprovação, você receberá um e-mail lhe avisado (se não for aprovado eles lhe dirão porque). Boa sorte!
Renovar o certificado automaticamente
Para evitar que o certificado expire faremos um script colocando o certbot para renovar uma vez ao mês pelo cron do servidor.
# vim /usr/local/src/ooklaserver/renova-certificado
Adicione:
#!/bin/bash
# Renova o certificado
/usr/bin/certbot renew -q
# Aguarda o certificado renovar
sleep 30
# Reinicie o OoklaServer
/usr/bin/systemctl restart ooklaserver
De permissão para execução e adicione ao cron, para que ele rode o script toda a meia noite do dia 1º de cada mês.
# chmod +x /usr/local/src/ooklaserver/renova-certificado
# echo '00 00   1 * *   root    /usr/local/src/ooklaserver/renova-certificado' >> /etc/crontab
Verifique se a última linha está nosso script.
# cat /etc/crontab
# /etc/crontab: system-wide crontab
# Unlike any other crontab you don't have to run the `crontab'
# command to install the new version when you edit this file
# and files in /etc/cron.d. These files also have username fields,
# that none of the other crontabs do.

SHELL=/bin/sh
PATH=/usr/local/sbin:/usr/local/bin:/sbin:/bin:/usr/sbin:/usr/bin

# Example of job definition:
# .---------------- minute (0 - 59)
# |  .------------- hour (0 - 23)
# |  |  .---------- day of month (1 - 31)
# |  |  |  .------- month (1 - 12) OR jan,feb,mar,apr ...
# |  |  |  |  .---- day of week (0 - 6) (Sunday=0 or 7) OR sun,mon,tue,wed,thu,fri,sat
# |  |  |  |  |
# *  *  *  *  * user-name command to be executed
17 *    * * *   root    cd / && run-parts --report /etc/cron.hourly
25 6    * * *   root    test -x /usr/sbin/anacron || ( cd / && run-parts --report /etc/cron.daily )
47 6    * * 7   root    test -x /usr/sbin/anacron || ( cd / && run-parts --report /etc/cron.weekly )
52 6    1 * *   root    test -x /usr/sbin/anacron || ( cd / && run-parts --report /etc/cron.monthly )
#
00 00   1 * *   root    /usr/local/src/ooklaserver/renova-certificado
Reinici o cron para ele carregar a nova rotina.
# systemctl restart cron
Se o certificado por venturar expirar e o script não renovar, basta você rodar na mão:
# certbot renew
# systemctl restart ooklaserver
Parabéns seu servidor está pronto!

Atualização
Para verificar a versão atual, execute o comando:
# /usr/local/src/ooklaserver/OoklaServer -v
Hoje, dia 12/11/2024, a versão em uso é:
2.11.1.2 2024-02-13.1456.91c4f93
Para realizar a atualização, acesse o diretório e interrompa o serviço.
# cd /usr/local/src/ooklaserver
# ./ooklaserver.sh stop
Remova o script de instalação e faça o download novamente:
# rm ooklaserver.sh
# wget https://install.speedtest.net/ooklaserver/ooklaserver.sh
Dê permissão de execução e execute a instalação:
# chmod a+x ooklaserver.sh
# ./ooklaserver.sh install
Pare novamente o serviço e inicie-o pelo systemd:
# ./ooklaserver.sh stop
# systemctl restart ooklaserver
Se quiser fazer uma doação para o café ficarei muito feliz pelo seu reconhecimento!

Se não puder doar pode deixar seu agradecimento nos comentário também ficarei feliz em saber que ajudei. Se tiver qualquer pergunta deixe-a também. Se preferir entrar em Contato clique aqui.


Show, muito obrigado pela aula, hehe
13/05/2025 Tudo funcionando! Debian 12
Este tutorial
não funciona mais, sempre só o mesmo erro seguindo a risca o tutorial.Crossdomain, upload e ipv6netgaug com problema.
Refiz aqui para validadar e o tutorial funciona, mas é fundamental entender que ele pode exigir adaptações ao seu ambiente.
Erro do Crossdomain pode esta ligadado ao seu DNS, pode ser tb que não ta informado corretamente em OoklaServer.allowedDomains
Upload e IPv6netgaug deve estar ligado a firewall da sua rede.
rodou tudo perfeito aqui liso igual quiabo
Rodou tudo sem erros, coisa linda
Estou com problema no netgauge… porta abertas no netstat -putan e mesmo assim, com erro
Estou com o mesmo problema. Alguma ajuda ?
Bom dia grande Remontti, em primeiro parabéns pelo excelente tuto, agora minha duvida tenho server speedtest antigo em funcionamento e queria criar este projeto seu em uma nona maquina, a pergunta eu criando este novo server com as mesmas características da antiga digo ip, domínio e etc não vou precisar novo cadastro no Ookla? porque não tenho dados de login e senha pois quem fez sumiu ou serra que terei que fazer uma nova conta?
Obrigado
Olá!
Primeiramente, muito obrigado pelo artigo, ajudou muito aqui!
Uma dúvida, não entendi muito bem o motivo de carregar os módulos tcp_illinois, tcp_westwood, tcp_htcp no sistema. Apenas o fato de carregar um módulo não implica em o modulo ser utilizado. Por exemplo, o módulo tcp_westwood é um modulo a ser utilizado para controle de congestionamento do TCP. Porém, ele só passará a ser utilizado de fato caso o parametro do Kernel net.ipv4.tcp_congestion_control seja ajustado para usar o westwood, neste caso: `net.ipv4.tcp_congestion_control=westwood`. Por padrão, o Kernel do Linux irá utilizar o Cubic como algoritmo para controle de congestinamento no TCP.
Existe algum motivo para esses três módulos estarem sendo carregados, mas não serem utilizados? Talvez eu tenha deixado escapar alguma coisa na explicação. Obrigado!
Recomendação da documentação.
Hoje dia 01/05/2024, funcionando 100% todo o tutorial, Rudmar voce é 10!
Obrigado Por Compartilhar. Estava usando a versão do Debian 10, desde 2021, mas começou a dar problema ai fiz instalação nova com essa versão e ficou OK agora.
Olá pessoal,
Será que implementar algumas regras de firewall a Ookla pode bloquear o servidor?
Pois reparei um consumo estranho no protocolo TCP e Port 443 Src. “meu IP” e Dst. 02 bloco de IP de AS diferentes.
Alguém já passou por este erro ? Segue a baixo. Se tiver a solução.
max_upload
details: http code: 0 Operation timed out after 10000 milliseconds with 0 bytes received
success: FAILED
Estou passando agora.
Alguma solucao?
No meu caso era problema no DNS, troquei, resolveu na hora.
Possible causes:
Firewall issues: Firewall issues can cause a connection timeout.
Incorrect SSL configuration: An incorrect SSL configuration can cause a connection timeout.
Plugin conflicts: Plugin conflicts can cause a connection timeout.
Outdated software: Outdated software can cause a connection timeout.
DNS server issues: DNS server issues can cause a connection timeout.
Ola, aqui deu super certo! valeu saudoso remontti 😀
ensina como fazer o backup do servidor para caso dê algum problema, ao invés de refazer todo procedimento simplesmente subir o backup, existe essa possibilidade?
uma sugestão
no arquivo /lib/systemd/system/ooklaserver.service
na linha [Service] acrescenta:
Restart=on-failure
RestartSec=5s
se por algum motivo o serviço falhar, com o ajuste acima, ele vai dar o restart automático
Bom dia Rudimar, obrigado pelos conteúdos que voce posta! Ali na parte onde voce cria um script para renovar o certificado:
#!/bin/bash
# Renova o certificado
/usr/bin/certbot renew -q
# Aguarda o certificado renovar
sleep 30
# Reinicie o OoklaServer
/usr/bin/systemctl restart ooklaserver
essa primeira linha #!/bin/bash não deveria ser sem o #, descomentada?
Abraços
Ela é usada para indicar qual interpretador de shell deve ser usado para executar o script. Nesse caso, #!/bin/bash especifica que o interpretador de shell a ser usado é o Bash, que é um dos interpretadores de shell.
Atualmente existe alguma restrição para registrar uma conta para um servidor recém instalado?
https://account.ookla.com/register/servers
Nunca recebo um email de confirmação, não enviam email de confirmação de criação de conta ou mudança de senha, alguém conseguiu criar conta recentemente?
tive esse problema amigo, o meu servidor de e-mail estva em uma black list da ookla, entrei em contato com a empresa que é responsvel em hospdar meu dominio e meus e-mails informei o que estava aconrecendo e eles resolveram, removendo meu dominio de e-mail da black-list, então consegui finalizar e ativar meu servidor ookla.
Un favor estoy haciendo todo el proceso y esta ok
Pero en Debian 11 no me hace conexión en ipv6 a mi servidor Hace ping localmente y desde fuera de internet hace ping a mi puerta de enlace pero entre el server y la puerta de enlace no .le agradezco su ayuda
obrigado. remontti, seus tutoriais são excelentes.
habilitar ipv6 com registros AAAA ?
SENSACIONAL!!! Como sempre que sigo os seus artigos… foi de primeira!!!!
MUITO OBRIGADOOOO
Olá! gostaria de saber qual o melhor cenário com Proxmox, Container ou VM?
Parabéns pelo ótimo tutorial!
Só uma “adição” da versão 2.6.x para a frente, não é necessário mais instalar e gerar o certificado, pois o instalador já faz automaticamente desde que no arquivo “OoklaServer.properties” não tenha nenhum certificado setado
Parabéns pelo trabalho, logo mais enviarei um pix.
Deu tudo certo, só quebrei cabeça no ipv6 rsrsrs
Como voce resolveu sobre o IPv6?
O problema foi o erro no ipv6 net gauge… no teste do servidor
verifica se o IPV6 ta funcionando no servidor
Tive um erro parecido era problema no apontamento do DNS AAAA, foi só ajeitar que funcionou. Mas na página do speedtest fala também de bloqueio em firewall e também checar se tem outro serviço rodando encima , verifica com um ”netstat -putan”.
ele funciona para teste interno sem gastar do link ?
Tu é o cara, sempre foi!
para configurar o speedtest custom é só seguir o tutorial anterior ?
Agora virou obrigatório ter ipv6 para hospedar um servidor do speedtest.
meu amigo nao sei porem estou com esse erro segundo o suporte do speedtest no meu ipv6 ( Hi,
Still not able to connect to your server on the IPv6 address on port 8080
curl -6 teste.wco.net.br:8080
curl: (7) Failed to connect to teste.wco.net.br port 8080: No route to host ) eo pior nao sei onde abro essa porta 8080 para ipv6
Excelente conteúdo.
Infelizmente tenho esse erro:
https
details: Response: , Error: SSL certificate problem: self signed certificate
tip: Connection over HTTPS failed.
status: FAILED
Tutorial impecável! Café foi pago kkk!
Obrigado!
O validador corrigiu a porta no teste. Agora o arquivo crossdomain.xml nao apresenta mais falha. Ficando desnecessário o uso do apache. Vlw
Bom dia!
Seria possível utilizar vários servidores speedtest em uma maquina apenas ?
Testando aqui e estou enfrentando problemas com o certificado SSL.
muito bom Rudimar vc é monstro funcionou 100%
Parabéns pelo ótimo tutorial!
Apenas um detalhe, que no script para renovar o certificado você chama o certbot com a flag –dryrun, que deve apenas “testar” se consegue renovar o certificado, e não renovar de fato.
Também achava que fosse assim, mas lendo a documentação lá diz:
Se esse comando for concluído sem erros, seus certificados serão renovados automaticamente em segundo plano.
Também observei esse disclaimer na documentação, mas me parece estar mal escrito hehehe, dando a entender de que se o “teste” feito em dry-run foi bem sucedido, as renovações automáticas vão ocorrer com sucesso…
Fiquei na duvida se vai funciona, na dúvida vou por editar para
Como de costume, sempre inovando parabéns mestre.