Criando certificado grátis com Let’s Encrypt para o Apache no Debian 10
Let’s Encrypt entrega certificados digitais que permite HTTPS (SSL/TLS) para sites gratuitamente, de maneira fácil. É um serviço fornecido pelo Internet Security Research Group
Requisitos:
Debian 10 Stretch / Instalação Limpa
(Funciona no Deb9)
Let’s Encrypt apresentado, vamos a instalação.
# su -
# apt update
# apt upgrade
# apt install letsencrypt python-certbot-apache
Para nosso exemplo crie um domínio virtual nas configurações do apache.
Lei mais em: Como ter diversos sub/domínios no mesmo servidor? (Domínios virtuais com Apache2)
Lembre de em seu servidor DNS ter configurado do host (no meu ex.: “blog”) apontando para o IP de seu servidor.
Criamos o arquivo que vai representar o host blog. Vou utilizar como base o diretório /var/www/blog que vamos criar em seguida.
# vim /etc/apache2/sites-available/cloud.conf
<virtualhost *:80>
        ServerName blog.remontti.com.br
        ServerAdmin noc@remontti.com.br

        DocumentRoot /var/www/blog

        <directory /var/www/blog/ >
                Options FollowSymLinks
                AllowOverride All
        </directory>

        LogLevel warn
        ErrorLog ${APACHE_LOG_DIR}/error_cloud.log
        CustomLog ${APACHE_LOG_DIR}/access_cloud.log combined
</virtualhost>
Por segurança recomendo remover a assinatura do servidor, evitando os “espertinhos”
# sed -i 's/ServerTokens OS/ServerTokens Prod/' /etc/apache2/conf-available/security.conf
# sed -i 's/ServerSignature On/ServerSignature Off/' /etc/apache2/conf-available/security.conf
Crie o diretório e uma uma index só para representar nosso “olá mundo”.
# mkdir /var/www/blog/
#  echo '<h1>Hello world!</h1>' > /var/www/blog/index.html
Antes de gerar o certificado pare “blog.remontti.com.br”.
# systemctl stop apache2
# letsencrypt --authenticator standalone --installer apache -d blog.remontti.com.br
Responda como abaixo:
Saving debug log to /var/log/letsencrypt/letsencrypt.log
Plugins selected: Authenticator standalone, Installer apache
Enter email address (used for urgent renewal and security notices) (Enter 'c' to
cancel): seu@email.com.br

- - - - - - - - - - - - - - - - - - - - - - - - - - - - - - - - - - - - - - - -
Please read the Terms of Service at
https://letsencrypt.org/documents/LE-SA-v1.2-November-15-2017.pdf. You must
agree in order to register with the ACME server at
https://acme-v02.api.letsencrypt.org/directory
- - - - - - - - - - - - - - - - - - - - - - - - - - - - - - - - - - - - - - - -
(A)gree/(C)ancel: A

- - - - - - - - - - - - - - - - - - - - - - - - - - - - - - - - - - - - - - - -
Would you be willing to share your email address with the Electronic Frontier
Foundation, a founding partner of the Let's Encrypt project and the non-profit
organization that develops Certbot? We'd like to send you email about our work
encrypting the web, EFF news, campaigns, and ways to support digital freedom.
- - - - - - - - - - - - - - - - - - - - - - - - - - - - - - - - - - - - - - - -
(Y)es/(N)o: N
Obtaining a new certificate
Performing the following challenges:
http-01 challenge for blog.remontti.com.br
Waiting for verification...
Cleaning up challenges
Created an SSL vhost at /etc/apache2/sites-available/blog-le-ssl.conf
Enabled Apache socache_shmcb module
Enabled Apache ssl module
Deploying Certificate to VirtualHost /etc/apache2/sites-available/blog-le-ssl.conf
Enabling available site: /etc/apache2/sites-available/blog-le-ssl.conf

Please choose whether or not to redirect HTTP traffic to HTTPS, removing HTTP access.
- - - - - - - - - - - - - - - - - - - - - - - - - - - - - - - - - - - - - - - -
1: No redirect - Make no further changes to the webserver configuration.
2: Redirect - Make all requests redirect to secure HTTPS access. Choose this for
new sites, or if you're confident your site works on HTTPS. You can undo this
change by editing your web server's configuration.
- - - - - - - - - - - - - - - - - - - - - - - - - - - - - - - - - - - - - - - -
Select the appropriate number [1-2] then [enter] (press 'c' to cancel): 2

- - - - - - - - - - - - - - - - - - - - - - - - - - - - - - - - - - - - - - - -
Congratulations! You have successfully enabled https://blog.remontti.com.br

You should test your configuration at:
https://www.ssllabs.com/ssltest/analyze.html?d=blog.remontti.com.br
- - - - - - - - - - - - - - - - - - - - - - - - - - - - - - - - - - - - - - - -

IMPORTANT NOTES:
 - Congratulations! Your certificate and chain have been saved at:
   /etc/letsencrypt/live/blog.remontti.com.br/fullchain.pem
   Your key file has been saved at:
   /etc/letsencrypt/live/blog.remontti.com.br/privkey.pem
   Your cert will expire on 2019-10-24. To obtain a new or tweaked
   version of this certificate in the future, simply run certbot again
   with the "certonly" option. To non-interactively renew *all* of
   your certificates, run "certbot renew"
 - Your account credentials have been saved in your Certbot
   configuration directory at /etc/letsencrypt. You should make a
   secure backup of this folder now. This configuration directory will
   also contain certificates and private keys obtained by Certbot so
   making regular backups of this folder is ideal.
 - If you like Certbot, please consider supporting our work by:

   Donating to ISRG / Lets Encrypt:   https://letsencrypt.org/donate
   Donating to EFF:                    https://eff.org/donate-le
Já pode acessar no navegador o domínio com HTTPS “blog.remontti.com.br”
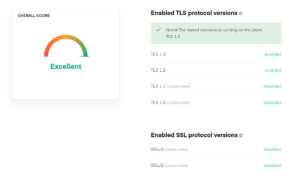
Dica, se desejar desativar o TLS1.0 e TLS1.1 após criar um certificado um arquivo é criado /etc/letsencrypt/options-ssl-apache.conf, então edite e inclua no SSLProtocol TLSv1 -TLSv1.1
# vim /etc/letsencrypt/options-ssl-apache.conf
Ficando
#SSLProtocol            all -SSLv2 -SSLv3
SSLProtocol             all -SSLv2 -SSLv3 -TLSv1 -TLSv1.1
Reinicie o Apache:
# systemctl restart apache2
Para testar acesse: https://www.cdn77.com/tls-test/

Para renovar automaticamente crie um script e adicione ao cron.
# vim /etc/renova-cert.sh
Adicione
#!/bin/bash
/usr/bin/systemctl stop apache2
/usr/bin/certbot -q renew
/usr/bin/systemctl start apache2
Damos permissão para executar
# chmod +x /etc/renova-cert.sh
Adicionamos ao Cron para toda meia noite renovar
# echo '00 00   * * *   root    /etc/renova-cert.sh' >> /etc/crontab
# systemctl restart cron
Agora você já tem seu domínio com certificado! Esse certificado pode ser utilizado para outro serviços.

Se não puder doar pode deixar seu agradecimento nos comentário também ficarei feliz em saber que ajudei. Se tiver qualquer pergunta deixe-a também. Se preferir entrar em Contato clique aqui.
Abraço!


Muito Obrigado, Parabéns!
funcionou certinho!
tenho a certeza que todo bem que você fizer, ele voltará para Ti.
Ótimo tutorial, como todos os conteudos do seu site, tenho uma dúvida, posso criar um servidor de certificado, e fazer com que meus servidores conectem nele e peguem os certificados necessarios, pois tenho firewall e outros serivços que nao estou conseguindo instalar o let´s encrypt e por tanto nao consigo seguir o passo a passo acima, grato pela atenção!
Parabéns pelo tutorial. Como eu posso fazer pra solicitar um único certificado que responda o www e sem www do meu virtualhost?
Gostaria de saber
Aqui estou usando com WSGI, apresentou o seguinte erro:
Name duplicates previous WSGI daemon definition.
gosto muito dos artigos de vocês, como sempre vocês facilitando a vida dos Brasileitos.
Cara, parabens tutorial muito claro, Deus te abençoe grandemente…
Muito bom material de estudos.
Deu certo tudo.
Muito obrigado pelo seu esforço.
muito bom!!
Muito Obrigado Rudimar!
Pena que estou desempregado, senão doaria o valor de um cappuccino caprichado.
Parabéns Doutor e muito obrigado, só uma pergunta consigo usar o certificado com site wordpress.
Obrigado.
Sim