Servidor WEB NGINX + PHP + MariaDB + phpMyAdmin + Letsencrypt no Debian 10 Buster (LNMP)

Neste tutorial vamos configurar um servidor web com NGINX (lê-se “engine x”), o concorrente do Apache. NGINX é um servidor web (HTTP e IMAP/POP3/Proxy) rápido, leve e com inúmeras possibilidades de configuração para melhor performance. O Apache, sem dúvidas, é o servidor web mais popular. No entanto, o NGINX a cada ano ganha mais popularidade e está sendo a preferência dos novos projetos.
Distribuição utilizada: Debian 10 Stretch / Instalação Limpa
NGINX
# apt install nginx
Acesse agora em seu navegador http://IP-SERVIDOR/

Se você acessar um diretório que não existe um erro dizendo que não existe, e junto informações que não é legal aparecer.

Vamos remover assinatura do nginx onde ele exibe a versão do mesmo. Ninguém precisa saber! Correto?
# sed -i 's/# server_tokens/server_tokens/' /etc/nginx/nginx.conf
# systemctl restart nginx

Pronto nosso NGINX está rodando!
MARIADB
MariaDB para quem ainda não sabe é um fork do MySQL, criado pelo próprio fundador do projeto MySQL após sua aquisição pela Oracle.
# apt install mariadb-server mariadb-client
Por segurança vamos setar uma senha do
# mariadb -u root
Não use a mesma senha do seu servidor, crie uma nova totalmente diferente! Dica acesse https://senhasegura.remontti.com.br/ e gere uma!
USE mysql;
UPDATE user SET password=PASSWORD('SENHA') WHERE User='root';
UPDATE user SET plugin="mysql_native_password";
FLUSH PRIVILEGES;
quit;
Agora quando for acessar o mariadb será necessário informar a senha.
# mariadb -u root -p
PHP7
Incluirei algumas extensões do PHP que são normalmente utilizada também na instalação.
# apt install php php-{fpm,cli,mysql,pear,gd,gmp,bcmath,mbstring,curl,xml,zip,json}
Agora vamos fazer a “integração” do PHP com o NGINX. Moveremos o arquivo defaul.
# mv /etc/nginx/sites-available/default /etc/nginx/sites-available/default.original
Crie um novo:
# vim /etc/nginx/sites-available/default
Ajuste:
server {
    listen 80;
    listen [::]:80;

    root /var/www/html;
    index index.php index.html index.htm;

    server_name _;

    location / {
        try_files $uri $uri/ =404;
    }

    location ~ \.php$ {
        include snippets/fastcgi-php.conf;
        fastcgi_pass unix:/var/run/php/php7.3-fpm.sock;
    }
}
Teste a configuração se não tem nada errado e restart os serviços:
# nginx -t
# systemctl restart nginx php7.3-fpm
Vamos criar um arquivo em PHP para testa se nosso NGINX está interpretando o PHP.
# echo '<?php phpinfo();' >> /var/www/html/teste.php
Acesse em seu navegador http://IP-SERVIDOR/teste.php
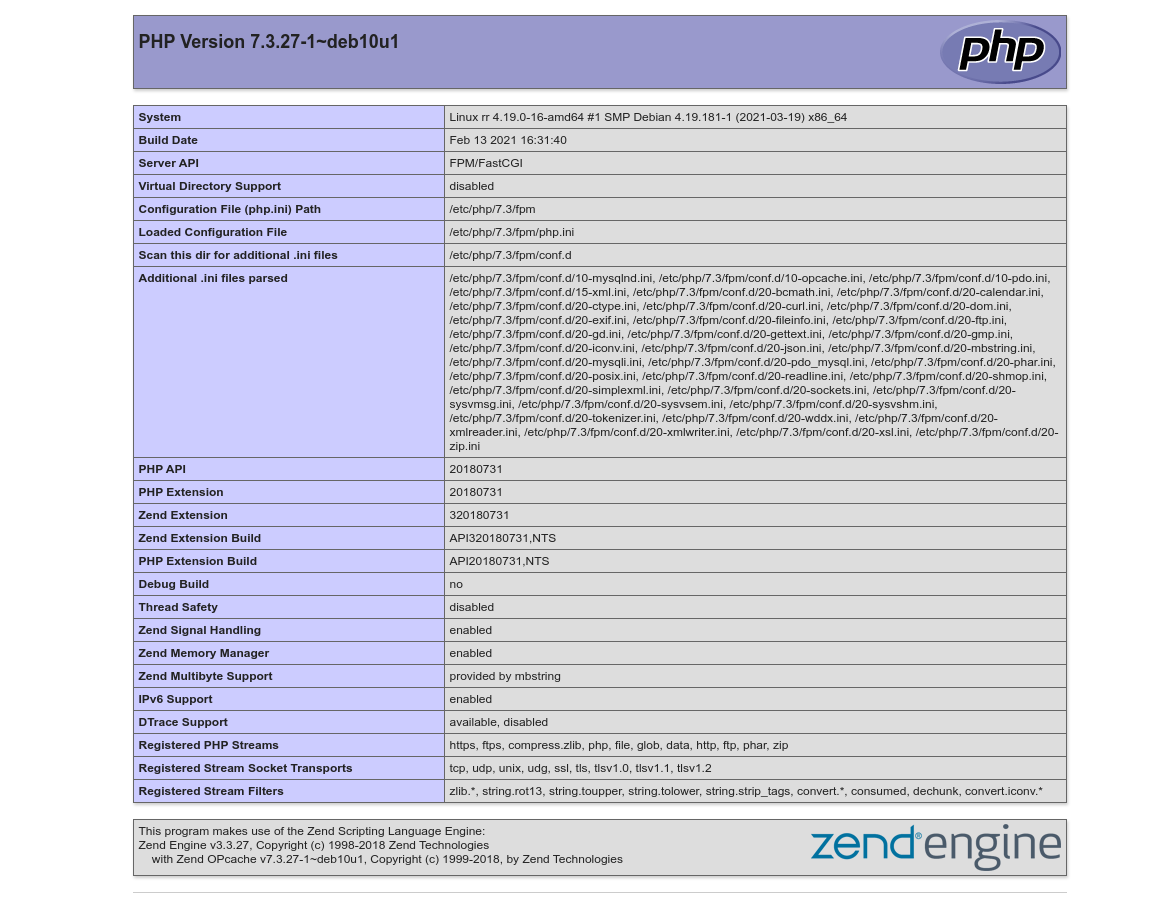
🙂 Nosso servidor WEB com PHP está funcionando!
Exemplo para multiplos domínios/subdomínios
# vim /etc/nginx/sites-available/sub1.conf
Neste ex: vou representar o sub1.remontti.com.br
server {
    listen 80;
    listen [::]:80;

    root /var/www/sub1;
    index index.php index.html index.htm;

    server_name sub1.remontti.com.br;

    location / {
        try_files $uri $uri/ =404;
    }

    location ~ \.php$ {
        include snippets/fastcgi-php.conf;
        fastcgi_pass unix:/var/run/php/php7.3-fpm.sock;
    }
}
# vim /etc/nginx/sites-available/sub2e3.conf
Neste ex: vou representar o sub2.remontti.com.br e sub3.remontti.com.br
server {
    listen 80;
    listen [::]:80;

    root /var/www/sub2e3;
    index index.php index.html index.htm;

    server_name sub2.remontti.com.br sub3.remontti.com.br;

    location / {
        try_files $uri $uri/ =404;
    }

    location ~ \.php$ {
        include snippets/fastcgi-php.conf;
        fastcgi_pass unix:/var/run/php/php7.3-fpm.sock;
    }
}
Link os arquivos no diretório “/etc/nginx/sites-available” que será carregado as novas configurações
# ln -s /etc/nginx/sites-available/sub1.conf /etc/nginx/sites-enabled/
# ln -s /etc/nginx/sites-available/sub2e3.conf /etc/nginx/sites-enabled/
Crie os diretórios referente a cada server_name.
# mkdir /var/www/sub1
# mkdir /var/www/sub2e3
# echo '<?php echo "Olá mundo do sub1!"; ?>' >> /var/www/sub1/index.php
# echo '<?php echo "Olá mundo do sub2e3!"; ?>' >> /var/www/sub2e3/index.php
Verifique se não tem nenhum erro e restart:
# nginx -t
# systemctl restart nginx
phpMyAdmin
Cade ele do repositório? O PHPMyAdmin não está mais disponível como pacote .deb no Debian 10. Fazendo um pesquisa o motivo é que o “pessoal” que faz empacotamento não tem uma versão estável. https://security-tracker.debian.org/tracker/CVE-2018-19968
Desta forma debian “obriga” com que o usuário instale-o a partir da fonte. https://www.phpmyadmin.net/downloads/
# apt install wget
# cd /tmp/
# wget https://files.phpmyadmin.net/phpMyAdmin/5.1.0/phpMyAdmin-5.1.0-all-languages.tar.gz
# tar -vxzf phpMyAdmin-5.1.0-all-languages.tar.gz -C /usr/share/
# mv /usr/share/phpMyAdmin-5.1.0-all-languages /usr/share/phpmyadmin
# mkdir /etc/phpmyadmin
# touch /etc/phpmyadmin/htpasswd.setup
# mkdir -p /var/lib/phpmyadmin/tmp
# chown www-data. /var/lib/phpmyadmin/ -R
Para nosso phpmyadmin funcionar corretamente precisamos criar um banco de dados para ele, e por segurança vamos tb criar um usuário só para ele.
# mariadb -p
Não esqueça de alterar “SUA_SENHA”.
CREATE DATABASE phpmyadmin;
CREATE USER 'pma'@'localhost' IDENTIFIED BY 'SUA_SENHA';
GRANT ALL PRIVILEGES ON phpmyadmin.* TO 'pma'@'localhost' IDENTIFIED BY 'SUA_SENHA' WITH GRANT OPTION;
FLUSH PRIVILEGES;
EXIT;
Agora vamos importar as tabelas e configura-lo.
# mariadb -u root -p phpmyadmin < /usr/share/phpmyadmin/sql/create_tables.sql
# cp /usr/share/phpmyadmin/config.sample.inc.php /usr/share/phpmyadmin/config.inc.php
# vim /usr/share/phpmyadmin/config.inc.php
Descomente/Adicone/Altere:
/* INFORME O BLOWFISH SECRET USE O GERADOR DE SENHA. DEVE TER 32 CARACTERES */
$cfg['blowfish_secret'] = 'dkJhGx83XR3JjuFrDn8kPp9NtXnkLptl';

/* ADICIONE  */
$cfg['TempDir'] = '/var/lib/phpmyadmin/tmp';

/* DESCOMENTE */
/* User used to manipulate with storage */
$cfg['Servers'][$i]['controlhost'] = 'localhost';
$cfg['Servers'][$i]['controlport'] = '';
$cfg['Servers'][$i]['controluser'] = 'pma';
$cfg['Servers'][$i]['controlpass'] = 'SUA_SENHA';

/* DESCOMENTE */
/* Storage database and tables */
$cfg['Servers'][$i]['pmadb'] = 'phpmyadmin';
$cfg['Servers'][$i]['bookmarktable'] = 'pma__bookmark';
$cfg['Servers'][$i]['relation'] = 'pma__relation';
$cfg['Servers'][$i]['table_info'] = 'pma__table_info';
$cfg['Servers'][$i]['table_coords'] = 'pma__table_coords';
$cfg['Servers'][$i]['pdf_pages'] = 'pma__pdf_pages';
$cfg['Servers'][$i]['column_info'] = 'pma__column_info';
$cfg['Servers'][$i]['history'] = 'pma__history';
$cfg['Servers'][$i]['table_uiprefs'] = 'pma__table_uiprefs';
$cfg['Servers'][$i]['tracking'] = 'pma__tracking';
$cfg['Servers'][$i]['userconfig'] = 'pma__userconfig';
$cfg['Servers'][$i]['recent'] = 'pma__recent';
$cfg['Servers'][$i]['favorite'] = 'pma__favorite';
$cfg['Servers'][$i]['users'] = 'pma__users';
$cfg['Servers'][$i]['usergroups'] = 'pma__usergroups';
$cfg['Servers'][$i]['navigationhiding'] = 'pma__navigationhiding';
$cfg['Servers'][$i]['savedsearches'] = 'pma__savedsearches';
$cfg['Servers'][$i]['central_columns'] = 'pma__central_columns';
$cfg['Servers'][$i]['designer_settings'] = 'pma__designer_settings';
$cfg['Servers'][$i]['export_templates'] = 'pma__export_templates';
Para torna-lo acessível altere o arquivo de configuração do seu NGINX, no exemplo vou colocar no arquivo default, mas você poderia estar configurando em seus domínios.
# vim /etc/nginx/sites-available/default
Adicione as linhas destacadas:
server {
    listen 80;
    listen [::]:80;

    root /var/www/html;
    index index.php index.html index.htm;

    server_name _;

    location / {
        try_files $uri $uri/ =404;
    }

    location ~ \.php$ {
        include snippets/fastcgi-php.conf;
        fastcgi_pass unix:/var/run/php/php7.3-fpm.sock;
    }

    location ^~ /phpmyadmin {
        root /usr/share;
        try_files $uri $uri/ =404;

        #allow  192.168.87.0/24;
        #allow  2001:0db8::/32;
        #deny   all;
        #error_page  403   http://www.remontti.com.br;

        location ~ .php$ {
            include snippets/fastcgi-php.conf;
            fastcgi_pass unix:/var/run/php/php7.3-fpm.sock;
        }

    }

}
Se deseja tonar o phpmyadmin acessivel apenas de alguns endereços IPs basta descomentar as linhas, e incluir seus prefixos. O error_page é para que quando a o acessante levar um proibido seja direcionado para um site.
allow  192.168.87.0/24;
allow  2001:0db8::/32;
deny   all;
error_page  403   http://www.remontti.com.br;
Basta acessar http://IP-SERVIDOR/phpmyadmin
LETSENCRYPT
Criando certificado valido para nossos domínios.
# apt install letsencrypt python-certbot-nginx
Tenha seu(s) domínio(s) configurado em /etc/nginx/sites-enabled/
# letsencrypt
Retorno do questionário:
Saving debug log to /var/log/letsencrypt/letsencrypt.log
Plugins selected: Authenticator nginx, Installer nginx
Enter email address (used for urgent renewal and security notices) (Enter 'c' to
cancel): dev@null.com

- - - - - - - - - - - - - - - - - - - - - - - - - - - - - - - - - - - - - - - -
Please read the Terms of Service at
https://letsencrypt.org/documents/LE-SA-v1.2-November-15-2017.pdf. You must
agree in order to register with the ACME server at
https://acme-v02.api.letsencrypt.org/directory
- - - - - - - - - - - - - - - - - - - - - - - - - - - - - - - - - - - - - - - -
(A)gree/(C)ancel: A

- - - - - - - - - - - - - - - - - - - - - - - - - - - - - - - - - - - - - - - -
Would you be willing to share your email address with the Electronic Frontier
Foundation, a founding partner of the Let's Encrypt project and the non-profit
organization that develops Certbot? We'd like to send you email about our work
encrypting the web, EFF news, campaigns, and ways to support digital freedom.
- - - - - - - - - - - - - - - - - - - - - - - - - - - - - - - - - - - - - - - -
(Y)es/(N)o: N

Which names would you like to activate HTTPS for?
- - - - - - - - - - - - - - - - - - - - - - - - - - - - - - - - - - - - - - - -
1: sub1.remontti.com.br
2: sub2.remontti.com.br   << CASO VOCÊ TENHA MAIS DE UM SUB CONFIGURADO
3: sub3.remontti.com.br    << IRÁ APARECER AQUI
- - - - - - - - - - - - - - - - - - - - - - - - - - - - - - - - - - - - - - - -
Select the appropriate numbers separated by commas and/or spaces, or leave input
blank to select all options shown (Enter 'c' to cancel): 1 << ESCOLHA QUAIS VC DESEJA
Obtaining a new certificate
Performing the following challenges:
http-01 challenge for sub1.remontti.com.br
Waiting for verification...
Cleaning up challenges
Deploying Certificate to VirtualHost /etc/nginx/sites-enabled/sub1.conf

Please choose whether or not to redirect HTTP traffic to HTTPS, removing HTTP access.
- - - - - - - - - - - - - - - - - - - - - - - - - - - - - - - - - - - - - - - -
1: No redirect - Make no further changes to the webserver configuration.
2: Redirect - Make all requests redirect to secure HTTPS access. Choose this for
new sites, or if you're confident your site works on HTTPS. You can undo this
change by editing your web server's configuration.
- - - - - - - - - - - - - - - - - - - - - - - - - - - - - - - - - - - - - - - -
Select the appropriate number [1-2] then [enter] (press 'c' to cancel): 2 << SE QUISER FORCAR SEMPRE HTTPS
Redirecting all traffic on port 80 to ssl in /etc/nginx/sites-enabled/sub1.conf

- - - - - - - - - - - - - - - - - - - - - - - - - - - - - - - - - - - - - - - -
Congratulations! You have successfully enabled
https://sub1.remontti.com.br

You should test your configuration at:
https://www.ssllabs.com/ssltest/analyze.html?d=sub1.remontti.com.br
- - - - - - - - - - - - - - - - - - - - - - - - - - - - - - - - - - - - - - - -

IMPORTANT NOTES:
 - Congratulations! Your certificate and chain have been saved at:
   /etc/letsencrypt/live/sub1.remontti.com.br/fullchain.pem
   Your key file has been saved at:
   /etc/letsencrypt/live/sub1.remontti.com.br/privkey.pem
   Your cert will expire on 2021-07-05. To obtain a new or tweaked
   version of this certificate in the future, simply run certbot again
   with the "certonly" option. To non-interactively renew *all* of
   your certificates, run "certbot renew"
 - Your account credentials have been saved in your Certbot
   configuration directory at /etc/letsencrypt. You should make a
   secure backup of this folder now. This configuration directory will
   also contain certificates and private keys obtained by Certbot so
   making regular backups of this folder is ideal.
 - If you like Certbot, please consider supporting our work by:

   Donating to ISRG / Let's Encrypt:   https://letsencrypt.org/donate
   Donating to EFF:                    https://eff.org/donate-le
Você pode também criar o certificado diretamente para um domínio.
# letsencrypt --authenticator standalone --installer nginx -d sub1.remontti.com.br
Não esqueça de colocar no seu cron para ele renovar o certificado, pois a cada 90 ele expira. Neste exemplo todo dia primeiro tento renovar.
# echo '00 00   1 * *   root    /usr/bin/certbot -q renew' >> /etc/crontab
# systemctl restart cron
Caso não renovar apenas rode o comando letsencrypt novamente.
Bônus: Modelo para WordPress
Como rewrite no NGINX é um pouco diferente vou deixar um ex.:
server {
    listen 80;
    listen [::]:80;

    root /var/www/sub2e3;
    index index.php index.html index.htm;

    server_name remontti.com.br www.remontti.com.br;

    location / {
        try_files $uri $uri/ /index.php?$args;
    }

    location ~ \.php$ {
        include snippets/fastcgi-php.conf;
        fastcgi_pass unix:/var/run/php/php7.3-fpm.sock;
    }
}
Dica, se desejar desativar o TLS1.0 e TLS1.1 após criar um certificado um arquivo é criado /etc/letsencrypt/options-ssl-apache.conf, então edite e inclua no SSLProtocol TLSv1 -TLSv1.1
# vim /etc/letsencrypt/options-ssl-apache.conf
Ficando
#SSLProtocol            all -SSLv2 -SSLv3
SSLProtocol             all -SSLv2 -SSLv3 -TLSv1 -TLSv1.1
Reinicie o Apache:
# systemctl restart apache2
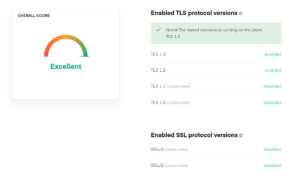
Para testar acesse: https://www.cdn77.com/tls-test/
Gostou?
Se quiser fazer uma doação para o café ficarei muito feliz pelo seu reconhecimento!

Se não puder doar pode deixar seu agradecimento nos comentário também ficarei feliz em saber que ajudei. Se tiver qualquer pergunta deixe-a também. Se preferir entrar em Contato clique aqui.
Fontes: https://docs.nginx.com/
https://docs.nginx.com/nginx/admin-guide/web-server/web-server/





Bom dia, Remontti, tudo bem?
Muito bom o tutotial, estou tentando aprender o NGINX para ver se mudo do Apache para ele.
Em relação ao WordPress, eu fiz essa reescrita como menciona no artigo, mas aqui quando coloco como nome do post ele da que a página não foi encontrada. O que pode ser?